


This guide contains all the information you need to know to get your new gear up and running, along with handy links to any available accessories and other relevant information. If you require technical support, please contact our support team for assistance. Contact details are contained within this guide.
Please ensure you have read through ALL warnings prior to setting up your product
- RISK OF DAMAGE AND INJURY FROM IMPROPERLY SECURED PANELS: Solar Panels mounted to all types of vehicles, including but not limited to, 4x4 vehicles, RVs, and caravans, are subject to high wind and vibration forces while driving. Fixed solar panels must be securely attached to the vehicle in accordance with all local and national safety standards.
- Mechanical fasteners must be used for mounting purposes. Adhesive fasteners do not provide adequate assurance of secure mounting.
- Always use the factory-provided mounting holes and the brackets available for the panel.
- Do not drill into the sides of the panel frame under any circumstances.
-
The use of an air dam/windbreak in front of the leading edge of the solar panel is highly recommended.
- Check the torque and general tightness of the mounting points at regular intervals.
- You must secure the panel as a vehicle load in line with the Load Restraint Guide for Light Vehicles (NTC) and any state projecting-load rules; overall dimensions must stay within ADR 43/04 and state VSI limits.
HARDKORR FIXED SOLAR PANEL OWNER'S GUIDE
Solar power isn’t just for your home. By adding a fixed solar panel to your 12V setup, you can harness the sun’s energy to charge your auxiliary batteries and keep your devices running wherever you take them. Whether you’ve got a full-sized SUV, dual-cab ute or a pint-sized two-door, there’s an option suitable for you. All you need is a solar panel, a solar regulator, and an auxiliary battery to store the power captured.
PRODUCT OVERVIEW
Our Fixed Solar Panel range is built with the user squarely in mind. the lightweight, shockingly thin construction will help with fuel economy as well as installation, and the tempered glass layer provides peace of mind that you're not going to be needing another panel for a long time.

PRODUCT DIMENSIONS
Please check back later for full dimensional specifications.
INSTALLING A FIXED SOLAR PANEL - FACTORY MOUNTS
To preface this part of the guide, we strongly recommend you always use the factory-provided mounting holes. It is the safest way to mount the fixed solar panels and provides a predictable result.
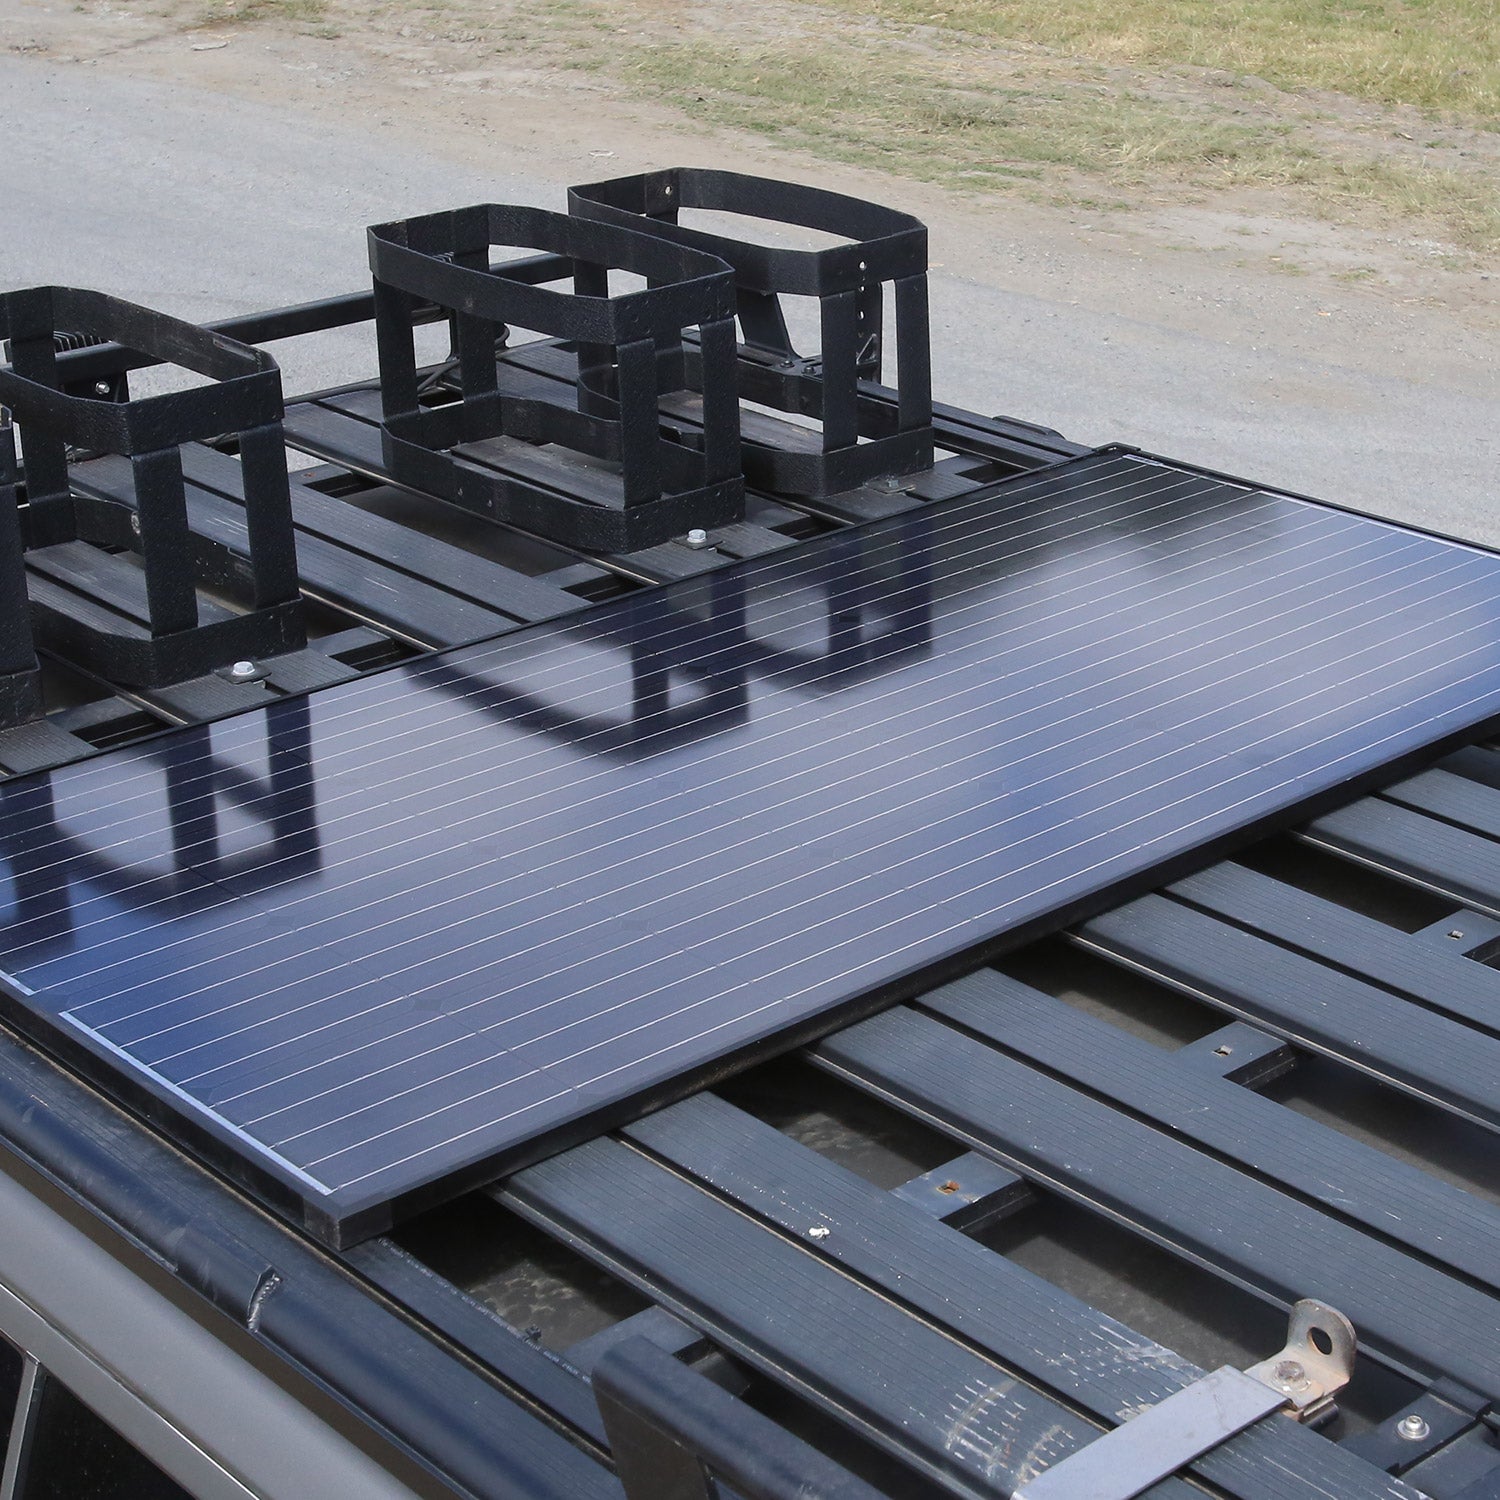
Fixed solar panels can be mounted either horizontally across, or vertically along the vehicle. When mounting horizontally, a crossbar system must be used and spaced to align with the original mounting points to ensure a safe and secure fitment.
The easiest way to mount your fixed solar panel is directly to a roof platform/rack with the dedicated Roof Rack Mounting Brackets for Fixed Solar Panels (HKPSOLFRRB), sold separately. You can purchase them by clicking the link below. For the purposes of this guide, installation will be demonstrated with the Hardkorr mounting brackets.
Later on you'll need to properly orient the mounting brackets, so here's a quick tip to get you on the same page as this guide. Place the bracket on a flat surface with the end of the bracket that has two slots flat against the surface. This is the position we'll be referencing up and down from in this guide. Keep that in mind when positioning the brackets in later steps.
- Find a suitable workspace in your garage or driveway with enough room to walk around the panel. Lay the solar panel down on the retail box, with the panel facing cell-side down.
- Take four of the locknuts and slot them nylon-side down into the gap between the rear of the panel and the frame, aligning one with each of the existing mounting holes.
- Take four of the small bolts and place firstly a spring washer, then a flat washer onto each bolt.
- Take one mounting bracket and thread the bolt with washers into the underside of the mounting bracket, through the single slot. Fasten the bolt into the locknut just enough that it is held but moveable, and repeat this for all four brackets.

- Flip the entire bracketed panel assembly over so the cells are facing upward.
- With the help of a second person if necessary, lift the panel into place in the desired location on your vehicle. In doing so, you can see if it is necessary to adjust the spacing of your mounting surfaces to match the mounting bracket slots.
- Once the holes in the brackets are aligned with the channels on the roof rack/platform, it can help to mark out where the T-bolts need to be positioned with some masking tape. Remove the solar panel and store it safely and out of the way. Thread the T-bolts into the required channels on the roof rack/platform in pairs, and position them at the tape marks.
- Place the solar panel back in position, and gently shift around to seat the T-bolts within the bracket slots.
- Thread firstly a flat washer, then a spring washer, then a locknut onto each T-bolt, and fasten securely.

- Underneath the solar panel, tighten the original bolts securing the mounting brackets.
PRODUCT SPECIFICATIONS
Table with all 4 models dimensions and specs.
| SPECIFICATION | 120W | 170W | 200W (N) | 200W (RTT) |
|---|---|---|---|---|
| Wattage | 120W | 170W | 200W | 200W |
| Working max. voltage | 22.0V | 21.0V | 23.5V | 25.0V |
| Working max. current | 5.45A | 8.1A | 8.51A | 8.0A |
| Open circuit voltage | 25.96V | 23.4V | 27.73V | 29.5V |
| Short circuit current | 6.0A | 9.55A | 9.63A | 8.8A |
| Cell efficiency | 22.5% | 22.5% | 22.5% | 22.5% |
| Max. system voltage | 1000V | 1000V | 1000V | 1000V |
| Operating temperature | -40°C to 85°C | -40°C to 85°C | -40°C to 85°C | -40°C to 85°C |
| Weight | 6.5kg | 8.6kg | 10.2kg | 10.4kg |